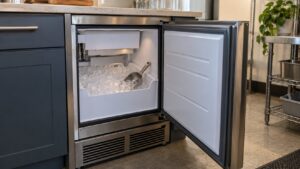
This guide explains the Kitchenaid Ice Maker E4 Error: what it means, what causes it, and how to resolve it safely.
Understanding the Kitchenaid Ice Maker E4 Error
Below, our specialists break down everything you need to know about the Kitchenaid Ice Maker E4 Error.
Understanding the Kitchenaid E4 Error
Below, our specialists break down everything you need to know about the Kitchenaid E4 Error.
What E4 means on your KitchenAid ice maker
Seeing E4 on the display panel of a KitchenAid ice maker means the unit’s self-monitoring logic has identified ice Bin Full or Not Present. E4 on KitchenAid ice makers indicates the ice bin is either full (production should stop automatically) or has been removed from the cabinet. On stand-alone models, E4 can also indicate a stuck ice-level sensor. That finding is exactly what triggers the KitchenAid E4 error.
In many cases you can address this yourself first: E4 clears automatically when the bin is properly seated and the level sensor detects the reduced ice volume. The rest of this guide walks through the symptoms you’d expect to see alongside it, the components most commonly responsible, and what a technician checks before recommending a repair.
Symptoms
The code rarely appears in isolation — here’s what else tends to show up alongside it:
- The ice maker display or indicator light shows the E4 code
- Ice production slows dramatically or stops altogether
- Ice cubes come out unusually small, hollow, cloudy, or fused together
Common causes
Root causes for this code fall into a few recognizable categories:
- Technicians also see bin truly full — normal operation lead to this code. The ice maker has filled the bin to capacity and production is paused as designed. This is the most common E4 cause and is not a problem. Worth ruling this out first since it costs nothing but a little time.
- Ice-level sensor stuck or obstructed is one of the more frequent triggers. The infrared or mechanical sensor that detects bin level is obstructed by a frozen cube or debris, reporting full even with a partially empty bin. This is one you can often rule out yourself before calling anyone.
- Bin removed from cabinet shows up often behind this code. On some models, removing the bin triggers E4 as a safety interlock. Replacing the bin clears the alert immediately. Worth ruling this out first since it costs nothing but a little time.
- Level sensor failed is one of the more frequent triggers. The level-detection sensor has failed, producing a persistent bin-full reading regardless of actual bin condition. Left to a specialist, this is usually confirmed with a multimeter or manufacturer diagnostic mode rather than guesswork.
Troubleshooting steps you can try
The steps below are safe to try yourself and, in some cases, clear the ice maker problem outright. Do them in sequence and stop if anything seems unsafe.
- Remove and reinstall the ice bin: Slide the bin out fully, dump all ice into a cooler or container, wipe the bin dry, and slide it back into the cabinet. Listen for the click of the bin seating fully into position. A bin that is not fully seated will keep showing E4 even if it is completely empty. Push firmly until it clicks.
- Clear any visible sensor obstruction: Look at the top rear of the bin area for the small IR sensor window. Wipe it clean of any frost or ice debris with a dry cloth. Avoid using water or cleaners near the sensor. A sensor lens that is frosted over reads any light blockage as a full bin. Keeping it clean prevents most nuisance E4 events.
When to call a technician
Schedule an experienced technician for your ice maker when:
- Level sensor replacement clears persistent E4
- Bin detection harness continuity fails at the control board
- Multiple sensors failing simultaneously
Since this particular code often clears with a simple reset, give that a try first — but don’t keep resetting past the point where the same problem keeps returning within a day or two. If you’d rather not troubleshoot a KitchenAid ice maker yourself, schedule a visit with our team, or browse our full error code library for related problems. For manufacturer specifications on your exact model, KitchenAid’s own site at kitchenaid.com is a useful reference, though our technicians are independent specialists and not affiliated with the manufacturer.
Before any appointment, jot down the exact code text, when it first appeared, and what you already tried — that short history lets an experienced technician arrive with the likely part already in hand instead of needing a second visit just to diagnose the problem.