This guide covers Kitchenaid Range Installation & Setup with practical, technician-backed advice.
This guide covers Kitchenaid Range Installation & with practical, technician-backed advice.
Installing a KitchenAid range involves matching the fuel type to your existing hookup, confirming clearances and ventilation, and — for gas models — having a licensed technician connect and leak-test the line, which is why most homeowners hire a specialist rather than attempting a swap themselves.
Understanding the Kitchenaid Range Installation & Setup
Below, our specialists break down everything you need to know about the Kitchenaid Range Installation & Setup.
Understanding the Kitchenaid Range Installation &
Below, our specialists break down everything you need to know about the Kitchenaid Range Installation &.
Gas, Electric, or Dual-Fuel: Know Your Hookup First
The single biggest factor in installation complexity is fuel type. A straight electric-to-electric swap is usually the simplest job, provided the existing outlet matches the new range’s amperage requirements. Gas ranges require a certified gas line connection and a leak test before the unit is ever used, and dual-fuel ranges need both a 240V electrical circuit and a gas line, since the oven runs electric while the cooktop runs gas. If you’re deciding between fuel types rather than replacing like-for-like, our dual-fuel vs. gas explainer breaks down the tradeoffs before you buy.
Clearance and Ventilation Requirements
KitchenAid ranges need specific side and rear clearances from cabinetry and combustible surfaces, and these vary by model and BTU output — always check the installation manual for your exact unit rather than assuming a like-for-like fit with your old range. Ventilation matters just as much: a range hood or downdraft system needs to be sized to the range’s output, particularly on high-BTU gas and dual-fuel models. If you’re installing new ventilation at the same time, see our range hood installation guide.
What Drives Installation Cost
Installation pricing starts from a base rate and increases based on a handful of variable factors: whether a new gas line or electrical circuit needs to be run, whether cabinetry needs modification to fit the new unit’s dimensions, whether the old range needs to be disconnected and hauled away, and whether the countertop or backsplash needs adjustment for a slide-in versus freestanding model. Get a firm quote after a technician has seen your kitchen’s actual layout rather than relying on a generic online estimate.
Slide-In vs. Freestanding Fit
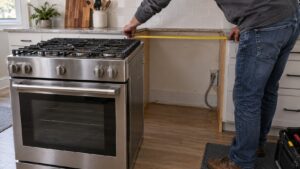
KitchenAid offers both freestanding ranges (finished side panels, can stand alone) and slide-in models (designed to sit flush between cabinets with the countertop overlapping the sides). Swapping between these two styles during a replacement often requires cabinetry or countertop adjustments, which is worth planning for in advance rather than discovering on installation day.
Safety Checks Before First Use
Before a new range goes into regular use, a proper installation includes leveling the unit, verifying the anti-tip bracket is anchored to the wall or floor (a code requirement in most areas), and — for gas models — a leak check at every connection point. Skipping the anti-tip bracket is one of the most common corners cut in DIY installs, and it’s a genuine safety hazard if a child or heavy cookware puts weight on an open oven door.
When to Call a Specialist
Electric swaps with matching hookups are sometimes manageable for a confident DIYer, but any gas connection, new circuit run, or cabinetry modification is worth handing to an experienced technician. Improper gas connections and unanchored ranges are both hazards that professional installation is specifically designed to avoid. For current KitchenAid range specifications and dimensions, see KitchenAid’s official site.
Planning Ahead for a Smooth Install Day
Measuring doorways and hallway widths for delivery access, confirming the range’s exact width against your cabinetry opening, and having your gas or electrical hookup inspected in advance all reduce the chance of a delayed or aborted installation. A brief pre-install site visit from an experienced technician is often the fastest way to catch these issues before the new range is already sitting in your kitchen.
Disposal of the Old Unit
Most installation services include removal of the old range, but confirm this ahead of time since hauling away a large appliance yourself adds an inconvenient extra step to the day. Many municipalities also require appliances to be disconnected and prepped a specific way for curbside pickup or recycling, which a technician handling removal will typically already know how to do correctly.