This guide covers Maintain Kitchenaid Dishwasher with practical, technician-backed advice.
ProWash cycles do a lot of the thinking for a KitchenAid dishwasher, sensing soil levels and adjusting accordingly — but the sensor and spray system it relies on still need physical upkeep. Skipping filter and spray arm maintenance is the most common reason a dishwasher that used to run silently starts leaving film on glasses or grinding on startup.
Understanding the Maintain Your Kitchenaid Dishwasher
Below, our specialists break down everything you need to know about the Maintain Your Kitchenaid Dishwasher.
Understanding the Maintain Kitchenaid Dishwasher
Below, our specialists break down everything you need to know about the Maintain Kitchenaid Dishwasher.
Clean the Filter Every Two to Four Weeks
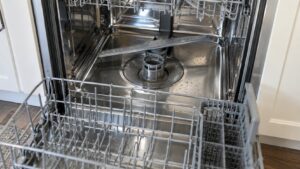
Unlike older dishwashers with a garbage-disposal-style grinder, most current KitchenAid models use a fine mesh filter at the bottom of the tub that has to be cleaned by hand. Food particles trapped there don’t just sit — they recirculate through the wash arms and end up back on dishes, which is the single most common cause of a “dishwasher isn’t cleaning well” complaint that has nothing wrong with the machine mechanically. Twist the filter free, rinse it under the tap, and clear any debris caught in the mesh.
Inspect and Clear the Spray Arms
The upper and lower spray arm jets can clog with mineral deposits or food debris small enough to pass the filter. A toothpick run through each jet clears blockages that would otherwise leave streaks or dry spots on dishes in that arm’s spray pattern. Spin each arm by hand while it’s out to confirm it moves freely — one that’s stiff or catches on something is worth investigating before it snaps.
Run a Monthly Empty-Cycle Clean
A dishwasher cleaner tablet or a bowl of white vinegar placed on the top rack and run through a hot empty cycle dissolves grease film and mineral buildup that accumulates on interior walls and the heating element over time. This is especially worth doing in hard-water areas, where mineral scale on the heating element reduces heating efficiency and can eventually trigger longer cycle times.
Check the Door Gasket and Drain Path
The rubber gasket around the door should be wiped down periodically to prevent mold and mildew buildup, particularly in humid climates. At the same time, check that the drain area at the tub’s bottom is clear of glass shards, labels, or bottle caps — these are a leading cause of drain pump failures that otherwise seem to come out of nowhere.
Use Rinse Aid Consistently
Rinse aid isn’t optional the way it can feel — it keeps water sheeting off dishes instead of beading, which reduces spotting and, over time, reduces mineral scale buildup inside the unit itself. Running low on rinse aid regularly is one of the more overlooked contributors to both poor drying performance and long-term scale accumulation.
Load Dishes to Support Even Spray Coverage
Even a perfectly clean filter and spray arm can’t overcome loading habits that block water from reaching every surface. Large platters or cutting boards placed on the lower rack can shield the upper spray arm’s water from ever reaching glasses above, and nesting bowls together traps soil in spots the wash cycle never touches. Angling items so soiled surfaces face the spray arms, and leaving gaps rather than packing the racks tightly, does as much for clean dishes as any filter maintenance.
When Cleaning Doesn’t Fix It
If dishes still come out cloudy or the cycle takes far longer than it used to after a full filter and spray arm cleaning, the issue is likely mechanical rather than a maintenance gap. Our appliance repair cost guides section and our dishwasher appliance page can help you understand what a service visit typically involves. KitchenAid’s official site has model-specific cycle and filter guidance as well. A dishwasher on this routine should hold its ProWash performance for years without needing a technician.
Getting your KitchenAid dishwasher fixed for good
The advice above applies to most KitchenAid dishwasher setups. If the problem behind “How to Maintain Your KitchenAid Dishwasher” persists after you have tried the safe checks here, an experienced KitchenAid technician can pinpoint the exact cause and complete the repair with genuine parts. Our specialists focus on KitchenAid dishwashers specifically, so diagnosis is faster and repeat visits are rarer.
Pricing starts from a base and depends on the diagnosis — we never quote a fixed price unseen, and completed work is covered by a labor guarantee. When you are ready, book a repair online, look up any problem in our dishwasher error-code library, or find your unit in the model directory.