This guide covers Clean A Kitchenaid Dishwasher Filter with practical, technician-backed advice.
This guide covers Clean Kitchenaid Dishwasher Filter with practical, technician-backed advice.
Cleaning your KitchenAid dishwasher filter takes about ten minutes and should be done roughly once a month, or more often if you notice dishes coming out with food residue, a lingering odor, or standing water at the bottom of the tub after a cycle. A clogged filter is one of the most common — and most preventable — causes of poor wash performance we see on service calls.
Understanding the Clean A Kitchenaid Dishwasher Filter
Below, our specialists break down everything you need to know about the Clean A Kitchenaid Dishwasher Filter.
Understanding the Clean Kitchenaid Dishwasher Filter
Below, our specialists break down everything you need to know about the Clean Kitchenaid Dishwasher Filter.
Locating the Filter
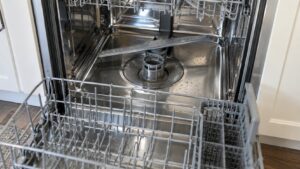
On most KitchenAid dishwashers, the filter assembly sits at the bottom of the tub, typically toward the back or center, beneath the lower spray arm. You’ll usually see a cylindrical or round component with a handle marked with an arrow or lock icon. Some models use a two-part filter system: a fine upper filter and a coarser lower filter that work together to trap food particles before water recirculates.
Removing the Filter
Start by removing the lower dish rack for full access. Turn the filter counterclockwise (following the arrow markings, usually about a quarter turn) to unlock it, then lift it straight up and out. If your model has a two-piece filter, the fine mesh upper filter typically twists free from the coarser lower cylindrical filter once separated from the tub. Handle both pieces carefully, since the mesh can bend if forced.
Cleaning the Filter
Rinse the filter under warm running water first to dislodge loose debris. For baked-on grease or stubborn buildup, soak the filter in warm water with a small amount of dish soap for 10-15 minutes, then use a soft-bristled brush — an old toothbrush works well — to gently scrub the mesh screen and any grooves where residue collects. Avoid using abrasive scrubbers or metal brushes, which can damage the fine mesh and reduce its ability to filter properly.
Checking the Filter Housing
While the filter is out, take a moment to inspect the housing area at the bottom of the tub for any debris, broken glass, or food particles that may have settled around the sump area. Wipe this area clean with a damp cloth before reinstalling the filter, since debris left in the housing can end up back in the filter almost immediately.
Reinstalling the Filter
Reverse the removal process: reinsert the lower coarse filter first if applicable, reattach the fine upper filter, and turn clockwise until it locks into place. Give it a gentle tug to confirm it’s seated correctly — a loose or improperly locked filter can rattle during the cycle or allow debris to bypass filtration entirely.
Signs Your Filter Needs More Frequent Cleaning
Households that wash a lot of cookware, don’t pre-rinse dishes, or use the dishwasher daily will typically need to clean the filter more often than every month. Watch for a persistent odor even after cleaning, dishes that come out with grit or spots, or unusually long cycle times, which can indicate the pump is working harder to push water through a partially blocked filter.
Tools You’ll Need
Most filter cleanings require nothing more than a soft-bristled brush, warm water, and mild dish soap. Keep a dedicated small brush near the dishwasher so the task is quick to grab rather than something you have to search for, which makes it far more likely you’ll actually stick to a monthly cleaning schedule instead of letting it slip for months at a time.
When Cleaning Doesn’t Solve the Problem
If wash performance doesn’t improve after a thorough filter cleaning, the issue may lie elsewhere — a worn spray arm, a failing wash pump, or a drain line clog. Our dishwasher features guide covers how different wash systems work, and our dishwasher repair service page can help diagnose persistent wash or drain issues. For model-specific filter maintenance instructions, see the owner resources at KitchenAid.com.